Summer is coming in hot, and I can’t wait. Chad and I love to relax by the pool with drinks in our hands. Maybe you do too. Or maybe you like to barbecue. I get it. There’s nothing like sunshine and a perfectly grilled steak (or tofu steak, or pineapple–insert drooling noise here.)
But as you break out your barbecue for the first time this year, the last thing you want to taste is the food from last year. A dirty grill will ruin the food you’re making. Let’s not spoil the first of many summer meals!
This article will cover how to clean a barbecue grill inside and out. Then I’ll share some tips on barbecue maintenance so that you spend less time cleaning and more time grilling!

BBQ Cleaning Products
Before we talk cleaning your BBQ, let’s discuss the PTTs, i.e., the products, tools, and techniques you need. Cleaning the barbecue is a big job, so understanding the PTTs will help you tackle BBQ cleaning without feeling overwhelmed.
To clean the barbecue from top to bottom, you’ll need these products:
- 1 tsp dish soap
- ½ cup baking soda
- Degreaser
- Paper towel
- Stainless steel cleaner
BBQ Cleaning Tools
We’ve covered the products; now let’s get into the tools. You do need more tools than most cleaning jobs to clean the BBQ, but you’ll already have a lot of these tools around the house.
BBQ brush: Use a wire brush for cast iron grilling grates. Use a stainless steel brush for stainless steel, ceramic coated, or enameled grilling grates.
Bucket: You’ll mix dish soap and water in here for easy access.
Non-scratch scouring pad: This will be used for scrubbing scratchable surfaces like plastic and stainless steel.
Rags: Cleaning a barbecue is a very dirty job, so use rags for the bulk of your work instead of staining your good microfiber cloths cloths.
Microfiber cloth: Break out the microfiber cloth to buff your BBQ once it’s nice and clean.
Rubber gloves: I’d recommend using gloves for the entire cleaning process.
Sponge: Any brand will do, you’re going to use this to apply and remove the degreaser.
How to Clean a BBQ Grill Exterior
OK, you’ve got your products and tools covered, so it’s time to get into the techniques. I’m going to go over exactly how to clean a BBQ and the techniques you’ll be using to do so. Before you know it you’ll be watching your in-laws argue over if that burger is cooked. Grilling can get messy. Whether you’re cooking up steaks or beyond burgers, oil and fat sizzle and splatter all over the BBQ, so we’re going to start by degreasing. Always work top to bottom so you don’t have to reclean anything. And before you get to work, make sure to disconnect any gas hookups.
Add about a tablespoon of degreaser to your sponge and apply it anywhere you see or feel grease. Pay extra attention to knobs, handles, and side panels. Use more degreaser where necessary. Let the degreaser sit and work its magic for five to 10 minutes. And yes, I do have a DIY degreaser recipe; I’m so glad you asked.
While you wait for your degreaser to work its magic, we can take care of a few more exterior cleaning tasks. Fill your bucket halfway with warm water and mix in 1 teaspoon of dish soap. Soak a rag in the soapy water and clean the propane tank area. It doesn’t need to be spotless but removing cobwebs and dust buildup is essential to barbecue maintenance. While you’re down there, check your propane tank and hoses as per your barbecue’s safety instructions.
Next, check your grease tray. This is removable from the outside on most barbecues. Dispose of any built-up grease. You can also use degreaser on this, but it doesn’t have to be perfect. It’s just a receptacle for runoff and doesn’t affect your food like the rest of the barbecue does. Give it a good wipe with a soapy rag and rinse with water. And never use tin foil to line the grease tray; it’s a fire hazard!
Now that the degreaser has had time to work on your barbecue’s exterior, take your sponge and start scrubbing. Saturate your sponge and scrub each area that you applied the degreaser. You’ll need to rinse your sponge frequently.
Once the heavier stains have been removed, you can use a rag soaked in the soapy water to get any remaining dirt or dust off the barbecue. Pro tip: switch out dirty rags with clean ones often. Otherwise, you’re just redepositing grease back onto your BBQ.
Finish by polishing any stainless steel on the exterior with a stainless steel cleaner. Wipe in the direction of the steel grain with a microfiber cloth to avoid scratches.
How to Clean a BBQ Grill Interior
At this point you’ve probably worked up an appetite, but you’re not done yet. It’s time to clean your grill’s interior. Once again, we’re going to work top to bottom so we don’t need to repeat any steps.
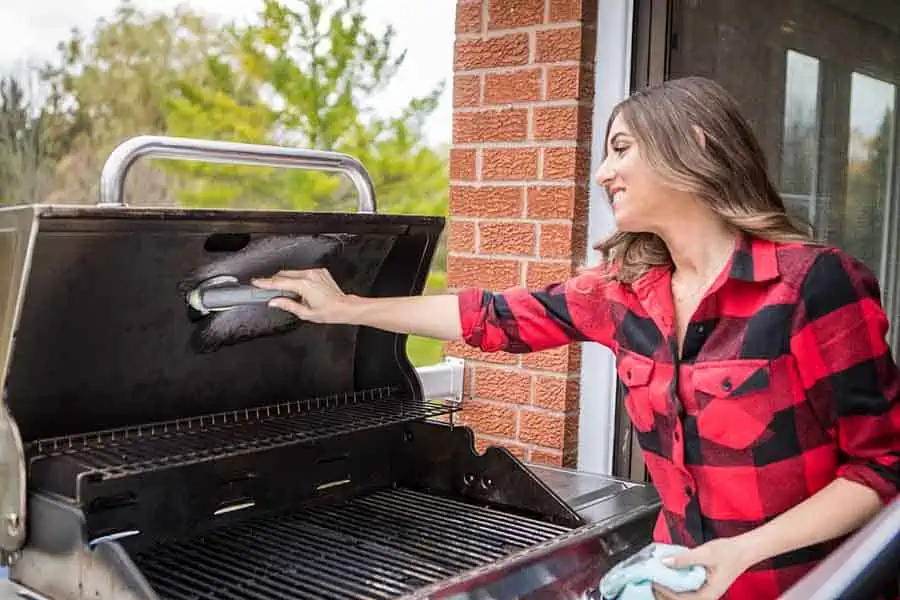
When you open the lid, you’ll likely find something that looks like black, peeling paint. Don’t get grossed out. This is just carbonized grease. It’s non-toxic but still good to remove regularly. Scrape it off with your scouring pad, letting any debris fall into the bottom of the cook box. Once it’s all gone, wash inside the lid with a soapy rag.
Next, move on to the grates. These come into direct contact with your food and will give it a funny taste if they’re not cleaned well. Scrape off any burned bits with your barbecue brush. Then, use a stainless steel brush if you have stainless steel, ceramic coated, or enameled grilling grates. The bristles will usually be silver. If you have cast-iron grilling grates, use a wire brush. Its bristles are typically gold. Using the wrong brush can scratch your grilling grates, leading to corrosion. Believe me, that’s even worse for your potentially perfect dinner.
If you can’t remove all of the grease and baked-on food with the brush, remove the grates from your BBQ and soak them in the sink. Use a solution of 1 teaspoon of dish soap, a half cup of baking soda, and 2 gallons of warm water.
While the grates soak, move onto the flavor bars. These are the triangular metal pieces beneath the grates. Remove the flavor bars, apply your degreaser, and let them sit for five to 10 minutes.
Next, move on to the burners. Make sure the jets (the tiny holes where the gas comes out) are not clogged. A good scrub with your scouring pad should do the trick. Always read the instructions specific to your barbecue model for proper burner maintenance.
Now we’re in the home stretch! Empty the bottom of the cook box of any debris as best you can. Many barbecues have a removable tray so you can just tip all of the debris into the garbage. Wipe clean with a soapy rag and rinse.
Now, back to the flavor bars. Scrub off all grease with a sponge, then rinse with soap and water. Dry the flavor bars and place them back into the barbecue. Scrub the grilling grates that have been soaking in the sink with a scouring pad. This should get any remaining burned food off. Dry the grates and place them back into the barbecue as well.
Finally, reconnect the gas line and voila. Your barbecue is shining in the sun and ready to cook!

How to Maintain a BBQ Grill
I recommend cleaning your grill before and after each use. The more time you give food and grease to solidify on your grill, the longer it will take to get it off. While cleaning the barbecue is definitely not what you want to do at the end of a meal, it will save you time and heartache (or grease ache) in the future.
Before each use, pour about a tablespoon of vegetable oil onto some paper towel and rub it into the cool grilling grates. This helps prevent food from sticking and makes for easier cleanup after. You want a thin, even coat along all of the grates.
Sorry olive oil lovers, but you need vegetable oil here. Vegetable oil has a high smoke point, so it can withstand any heat that the grill throws at it. Olive oil can leave a sticky residue if used at higher temperatures, and certain cooking sprays contain chemicals that can corrode the grills.
Finally, use a barbecue cover to keep the exterior clean between uses. This will prevent pollen, dust, cobwebs, and bugs from getting in.
How to Clean a BBQ Grill
A deep clean of your barbecue is a big job, but it’s worth it to keep the food you’re grilling tasting great. And maintaining your barbecue by cleaning before and after every use will significantly cut down on the time you spend cleaning.
This is a no-stress summer, so don’t let grease stains and weird-tasting food get you down. And if you’re looking for some more summer cleaning info, be sure to read How to Wash Stinky Flip-Flops and Sandals and Does a Pool Really Need a Robot Vacuum.
And that’s it, you are truly a master of cleaning the barbecue. When you show off your clean barbecue at your next family gathering, tag us on Instagram @cleanmyspace. Happy grilling! I can almost taste it.
Looking for a BETTER & EASIER Way to Clean Your Home?
Cleaning Expert Melissa Maker is here to help with her game-changing 3 Wave Cleaning System that will help you clean your house faster and easier than you ever thought possible!


")


 Clean with Vinegar!")


